

2024+ Land Cruiser Complete Power System - LC250
Hybrid vehicles have their advantages and disadvantages; we are not here to argue that...we are here to solve a major problem found in the new Toyota Hybrid platforms, and that includes the LC250.
Toyota chose to install the 12-volt battery in the rear of the vehicle, making aftermarket wiring and electrical work a massive pain for most consumers due to the invasive nature of the install if done in traditional ways; we have a solution for this though, that you can install yourself, at home as a weekend project!
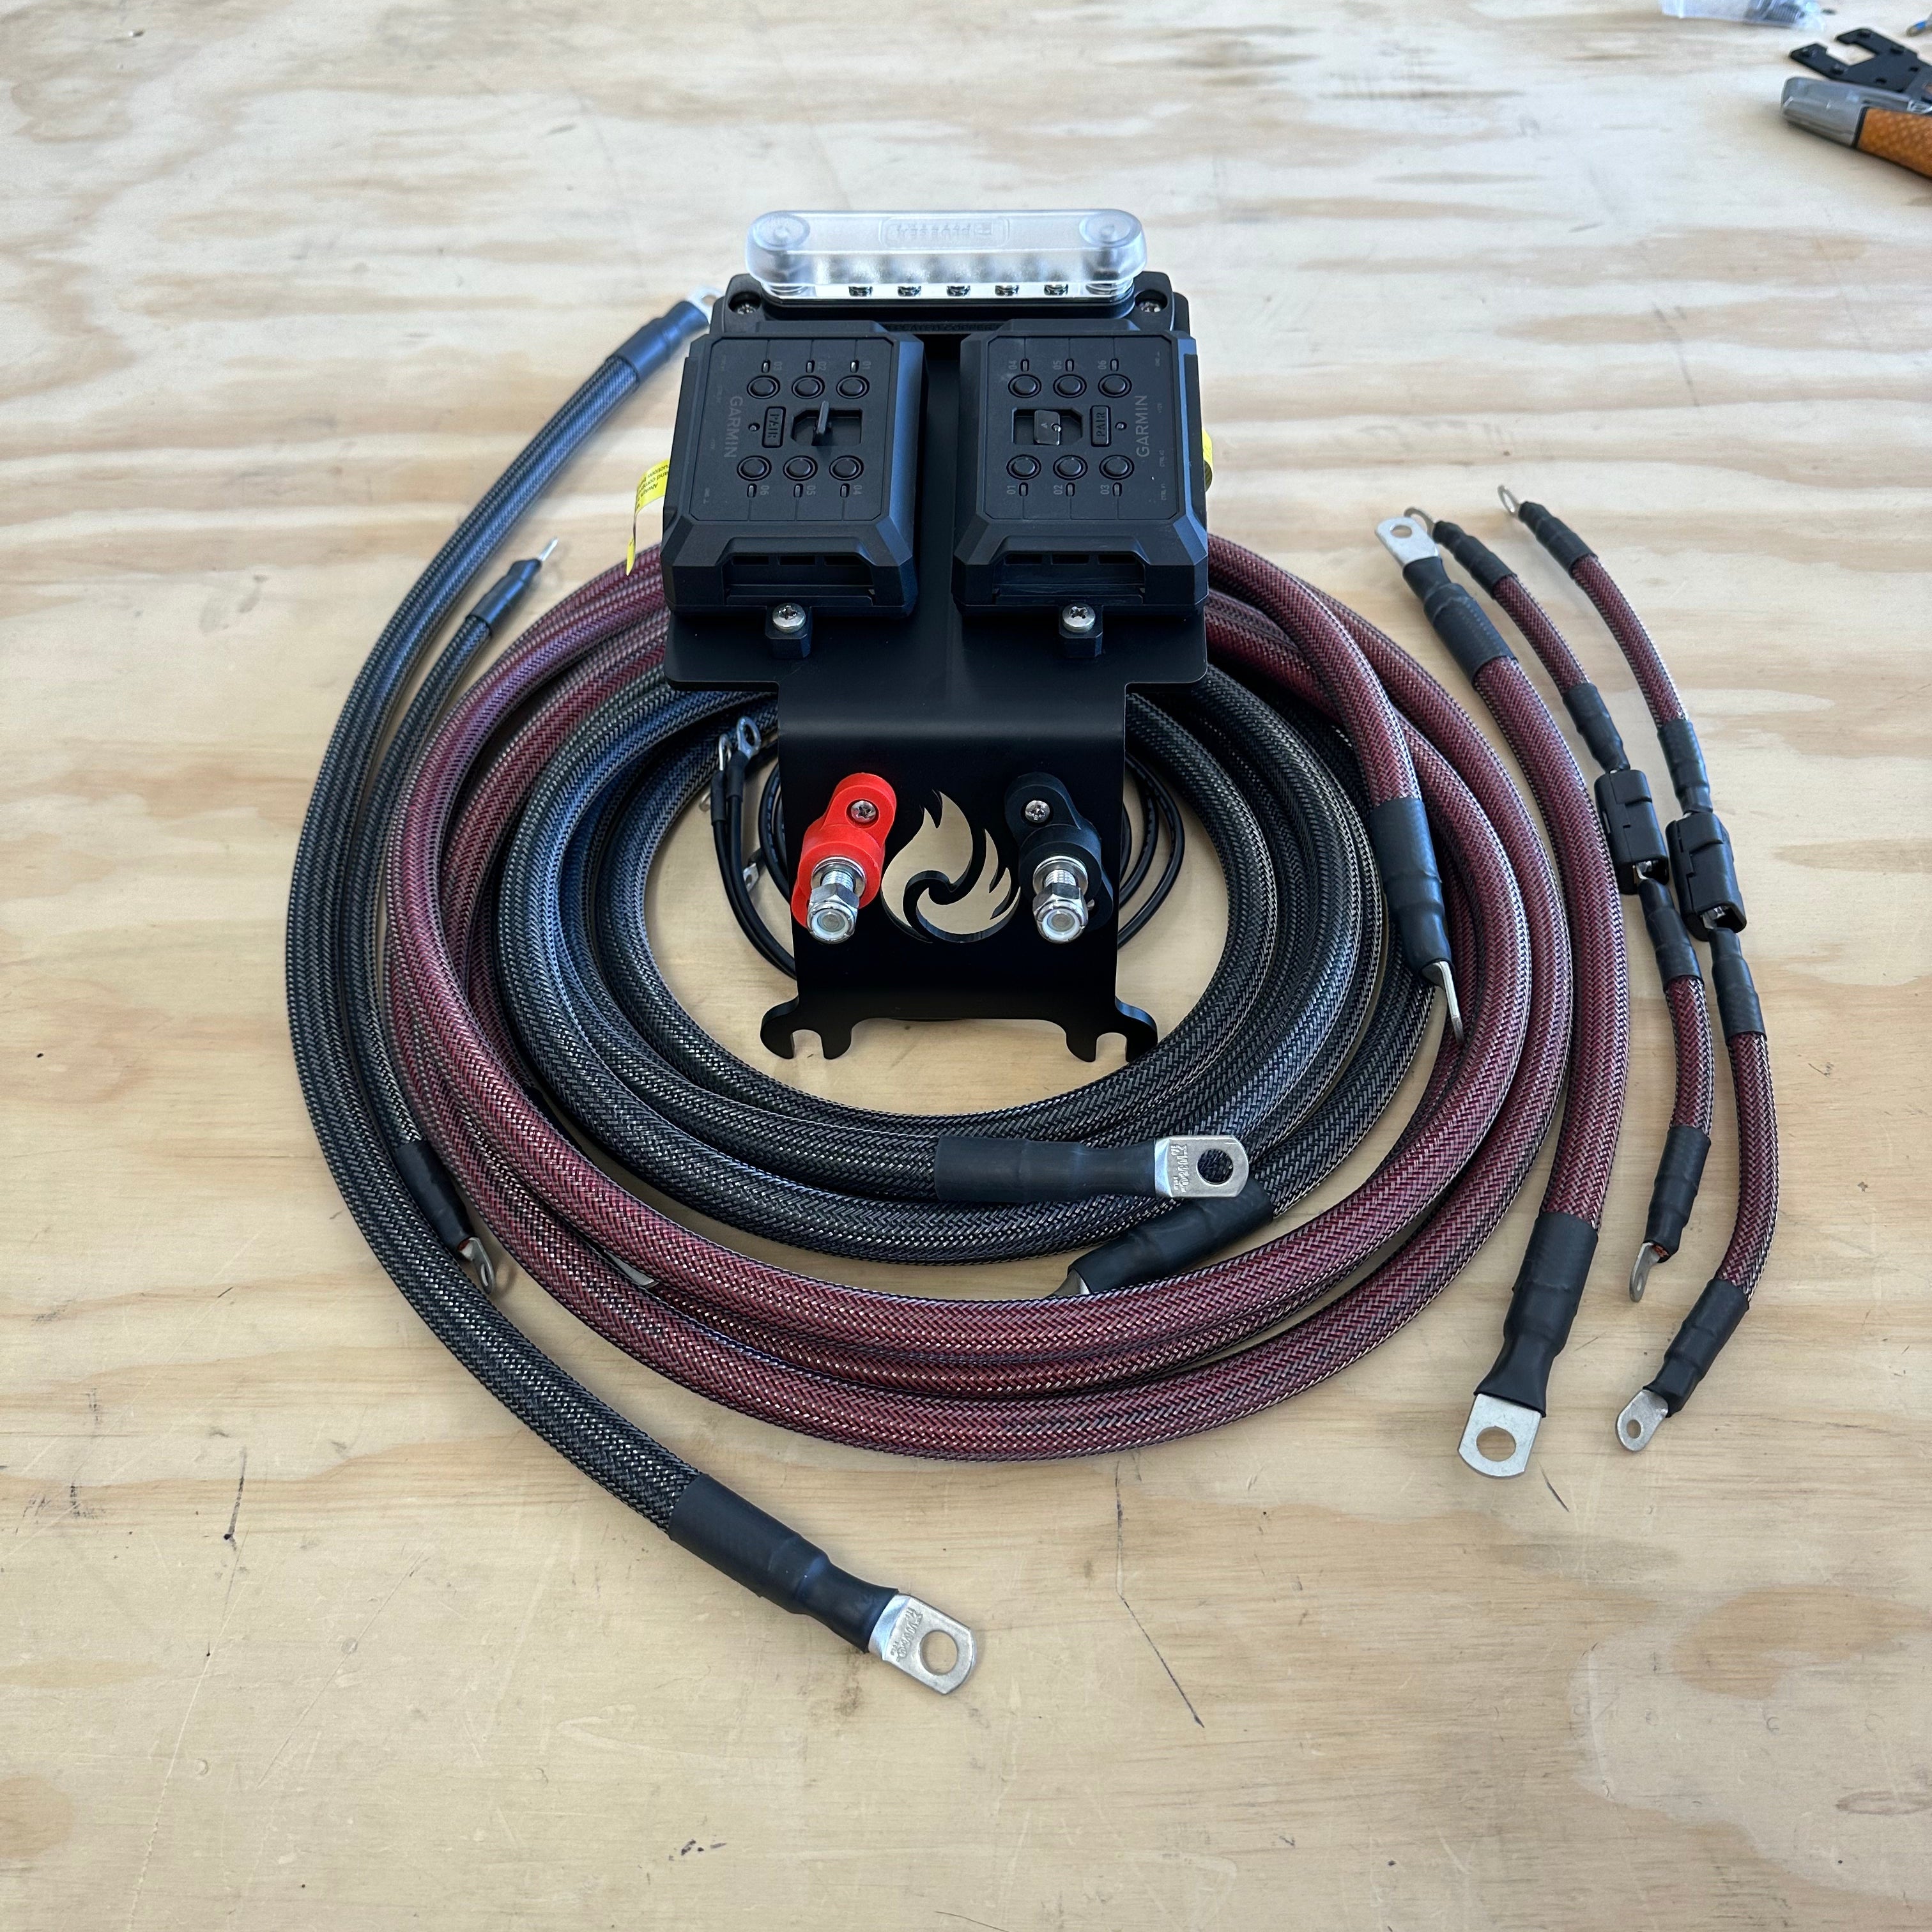
Power Relocation Kit:
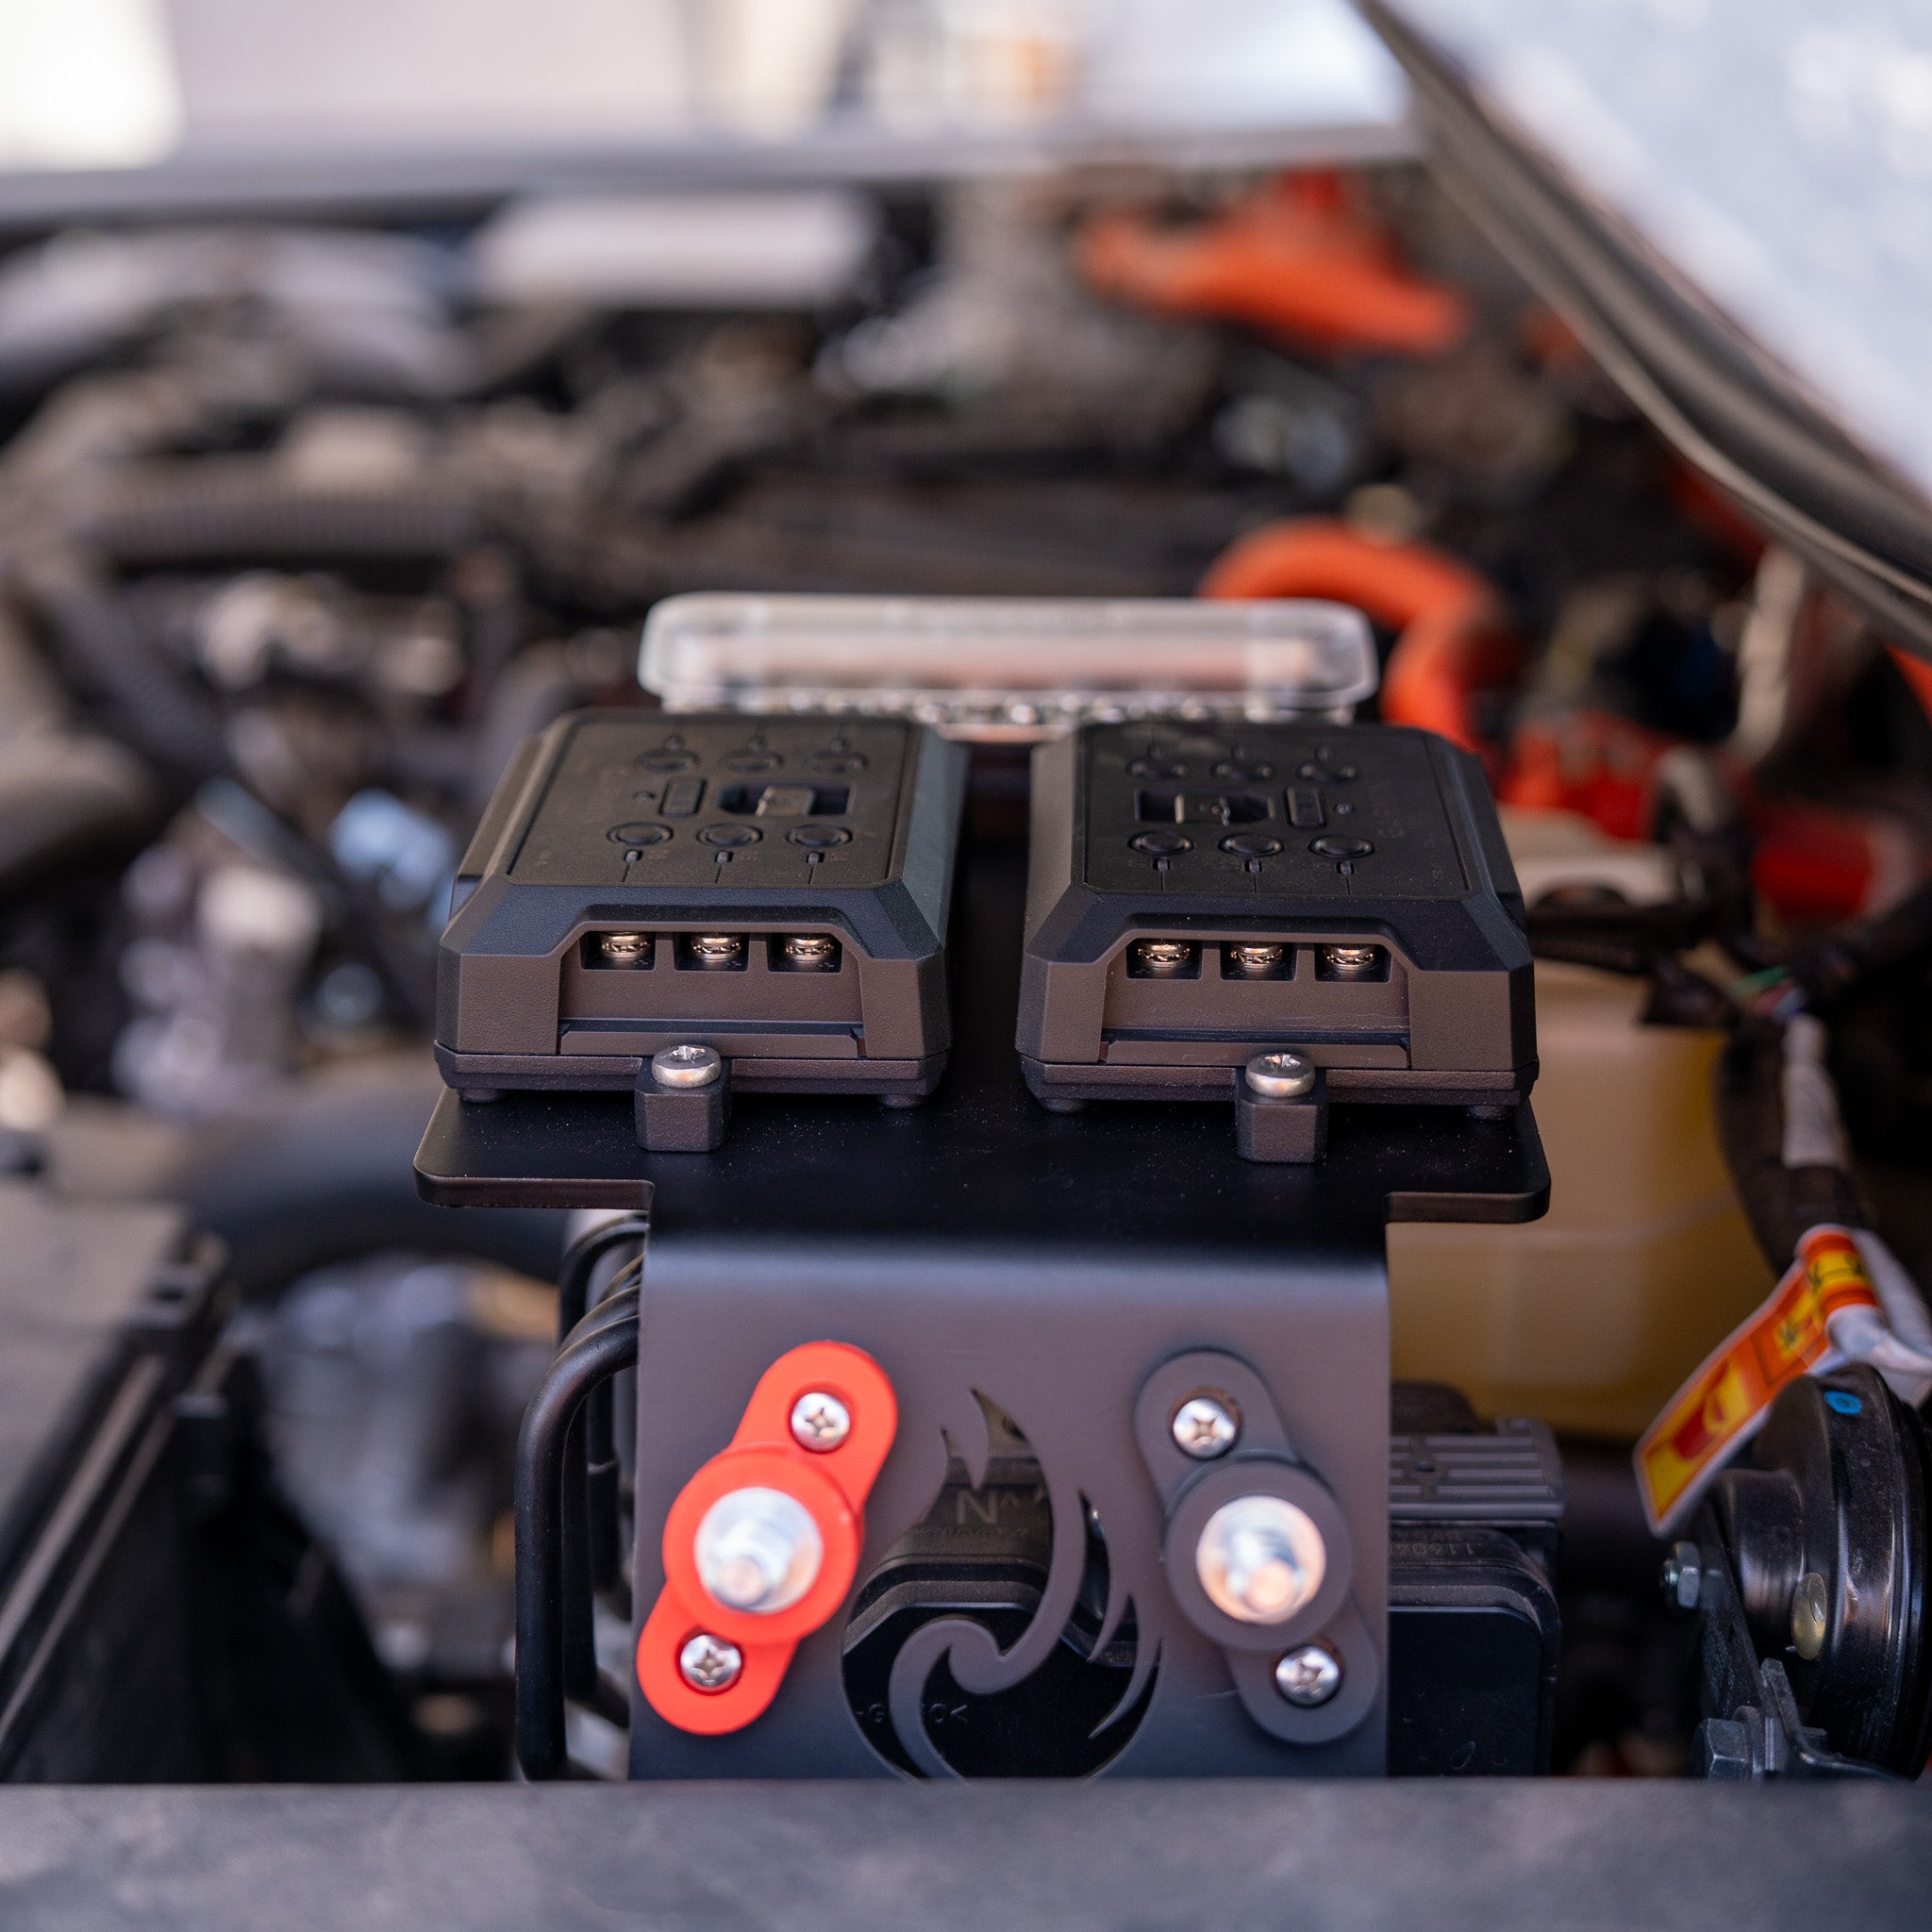
- Garmin PowerSwitch (Two included)
- Blue Sea Systems ground bar
- Power cables from the battery to pass through
- Power cables from pass-through to under-hood mount
- Power pass throughs
- All fuses, hardware, and components needed to run power from the rear battery to under the hood, and power the Garmin PowerSwitch.
ADVANCED INSTALL WARNING
To install this kit, you will need to drill two 1-5/16" holes through your rear metal fender well, as this is the safest, cleanest, and most sealed option for getting power out of the vehicle using our pass-throughs.
For this reason, we consider this a more advanced install. If you are able to use a drill and a hole saw, you will be set, but please know that this kit does require drilling!
2-4 week lead time.
From the complete battery cable assemblies, to the billet battery terminal and laser cut brackets, everything that we make in this kit is made in the USA.
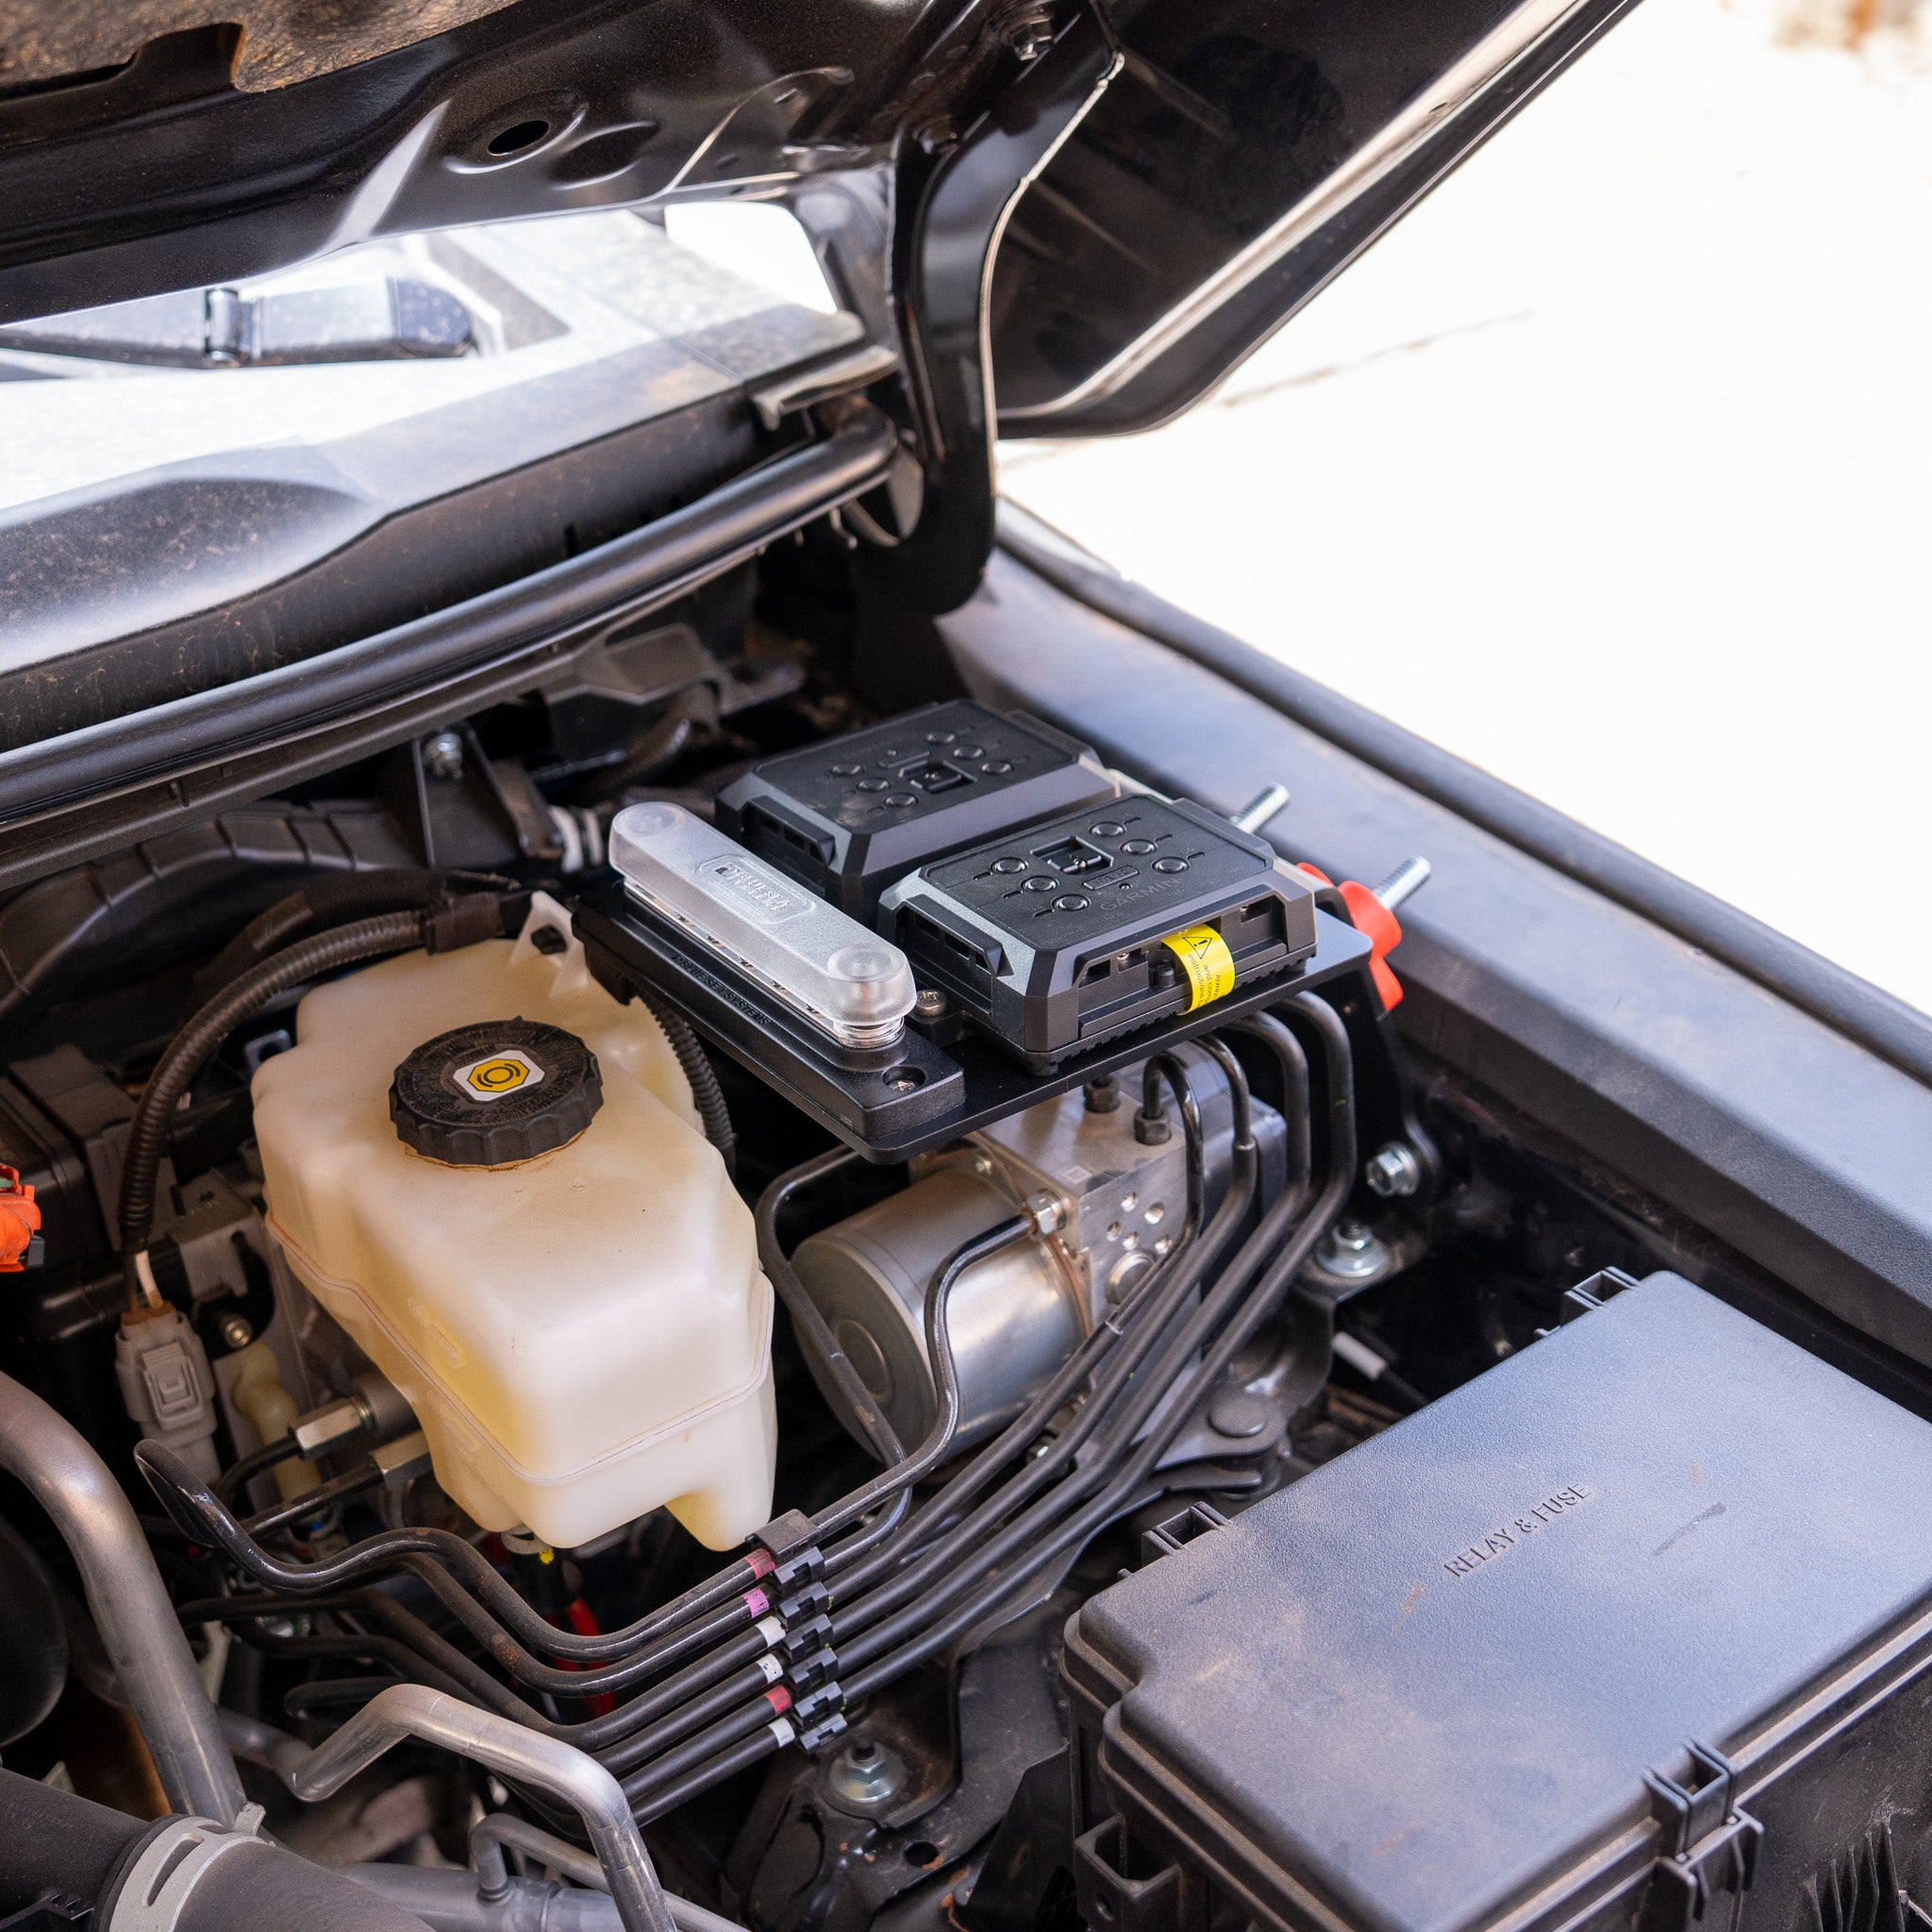
This kit is designed to bring useable power from the factory 12 volt battery to where you need it, under the hood.
This kit is designed with a fully built rig in mind, giving you the ability to run an air compressor, winch, and upto two Garmin PowerSwitch units.
This kit includes everything needed to get up and running with the PowerSwitch units, and everything you need to connect your other aftermarket accessories to our system!
The Garmin PowerSwitch offers multiple control options, none of which require you to route wires through your firewall—making installation and operation simple and seamless.
Turn your switches on and off via:
• The Garmin PowerSwitch App (on your phone or tablet)
• Factory head unit using Apple CarPlay®
• Factory head unit using Android Auto™
• Garmin off-road navigation devices
• Trigger inputs (for factory upfitter switches or physical buttons)
Vehicle Compatibility:
Whats In The Box?
Lead Times:
Description
Payment & Security
Payment methods
Your payment information is processed securely. We do not store credit card details nor have access to your credit card information.
LC250 Content You'll Love!
Watch us Jump our new LC250! PS: New updated video to come, with the new Power-System, and the new long travel kit!
Newsletter
Sign up for exclusive offers, original stories, events and more.
EmailSubscribe
Boring Stuff
© 2025Blaze Off-Road.
- Toyota LC250 - Hybrid
- Toyota 4Runner (2025+) - Hybrid
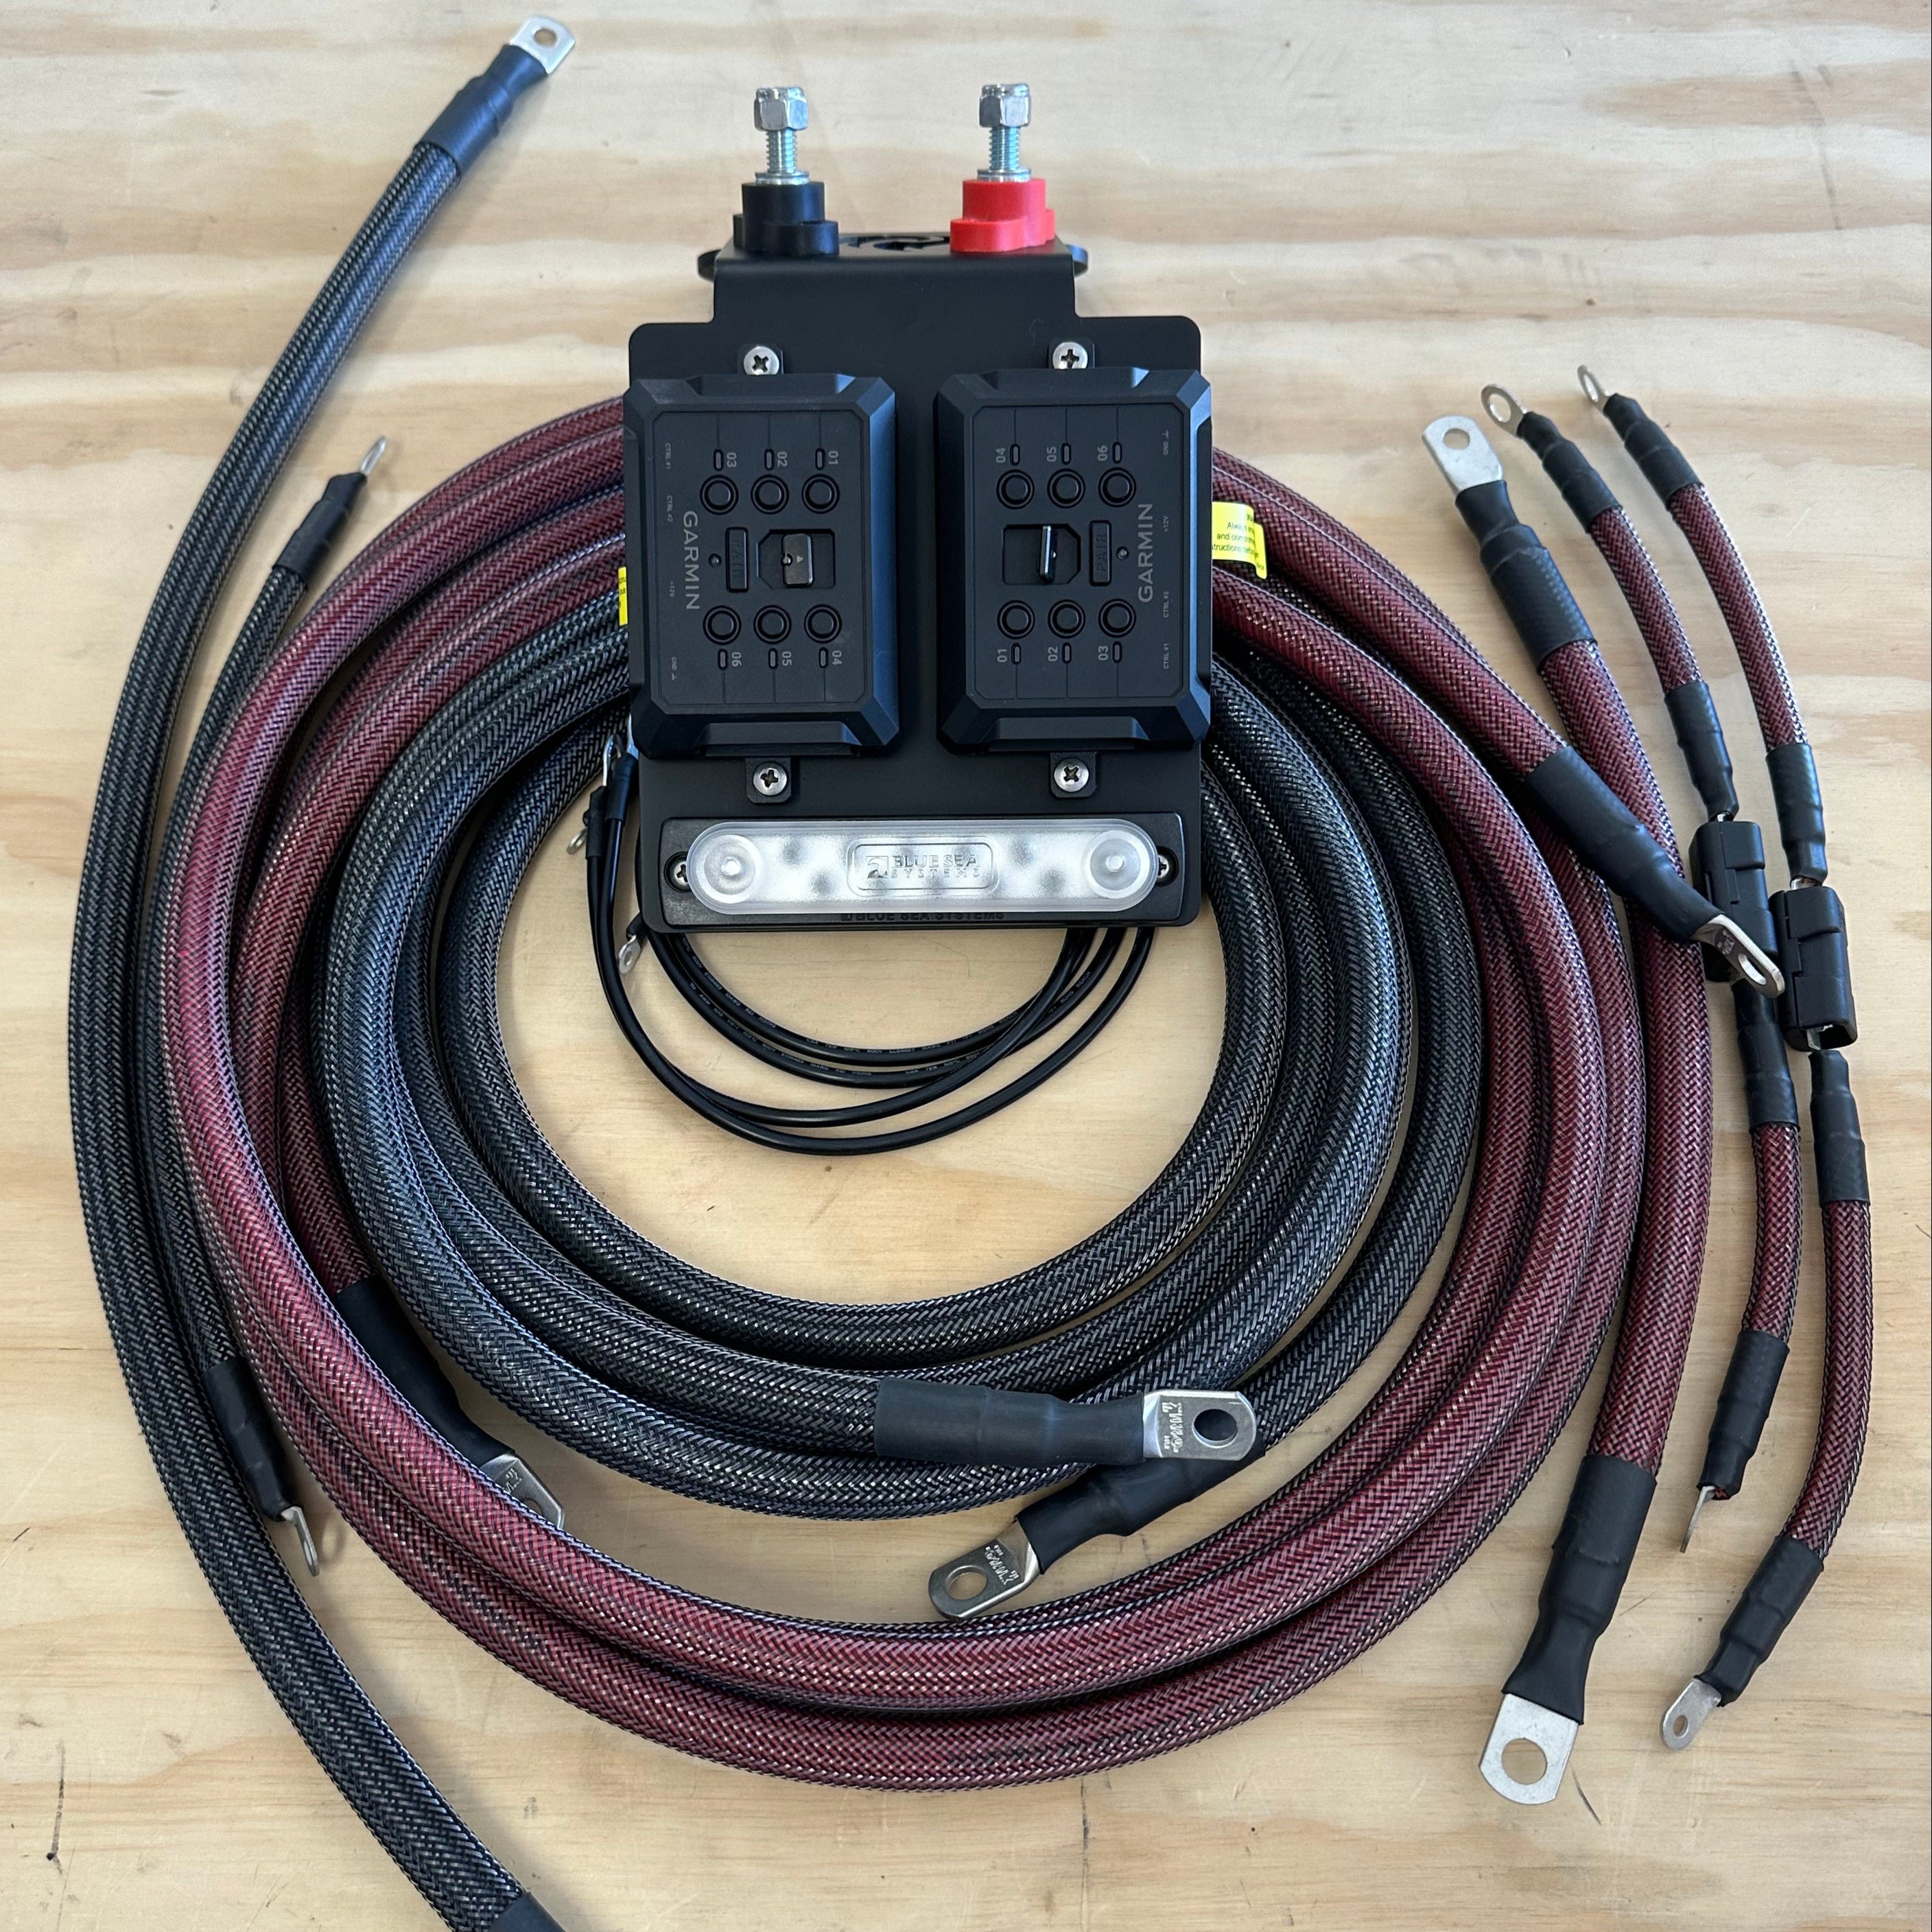
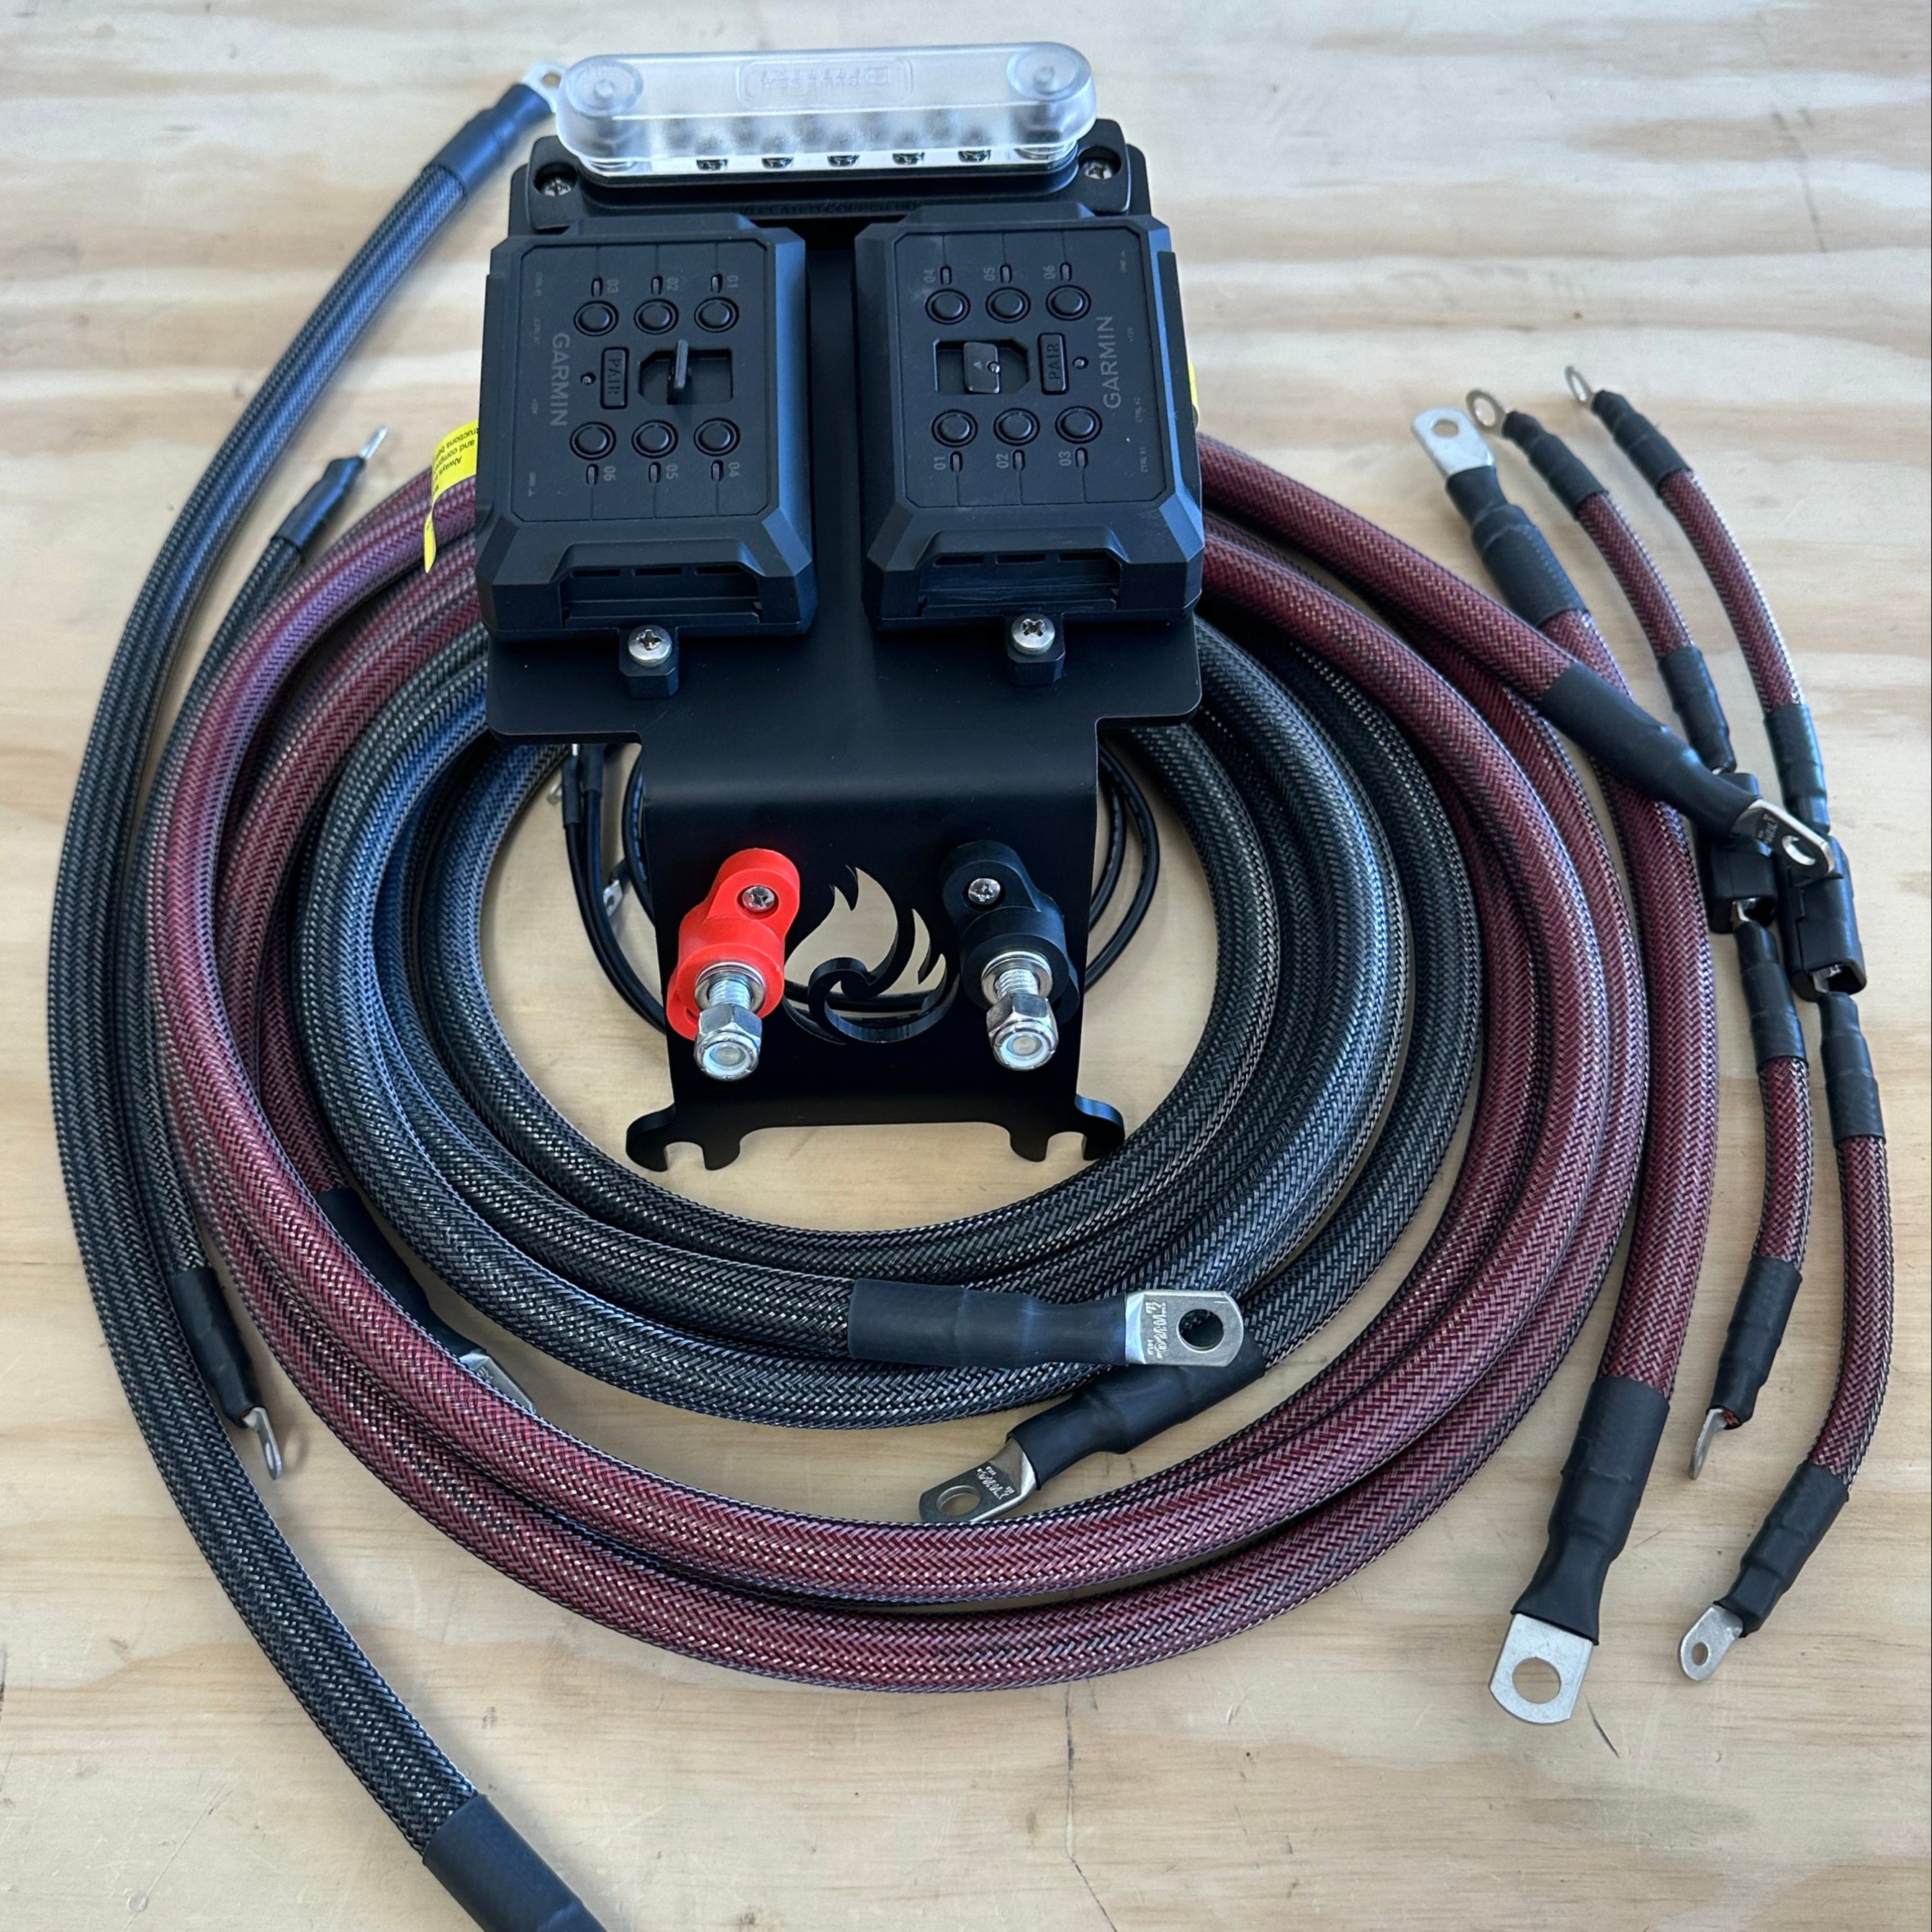
This kit will have mounting provisions for and/or include the below parts:
- Garmin PowerSwitch (two included - if selected)
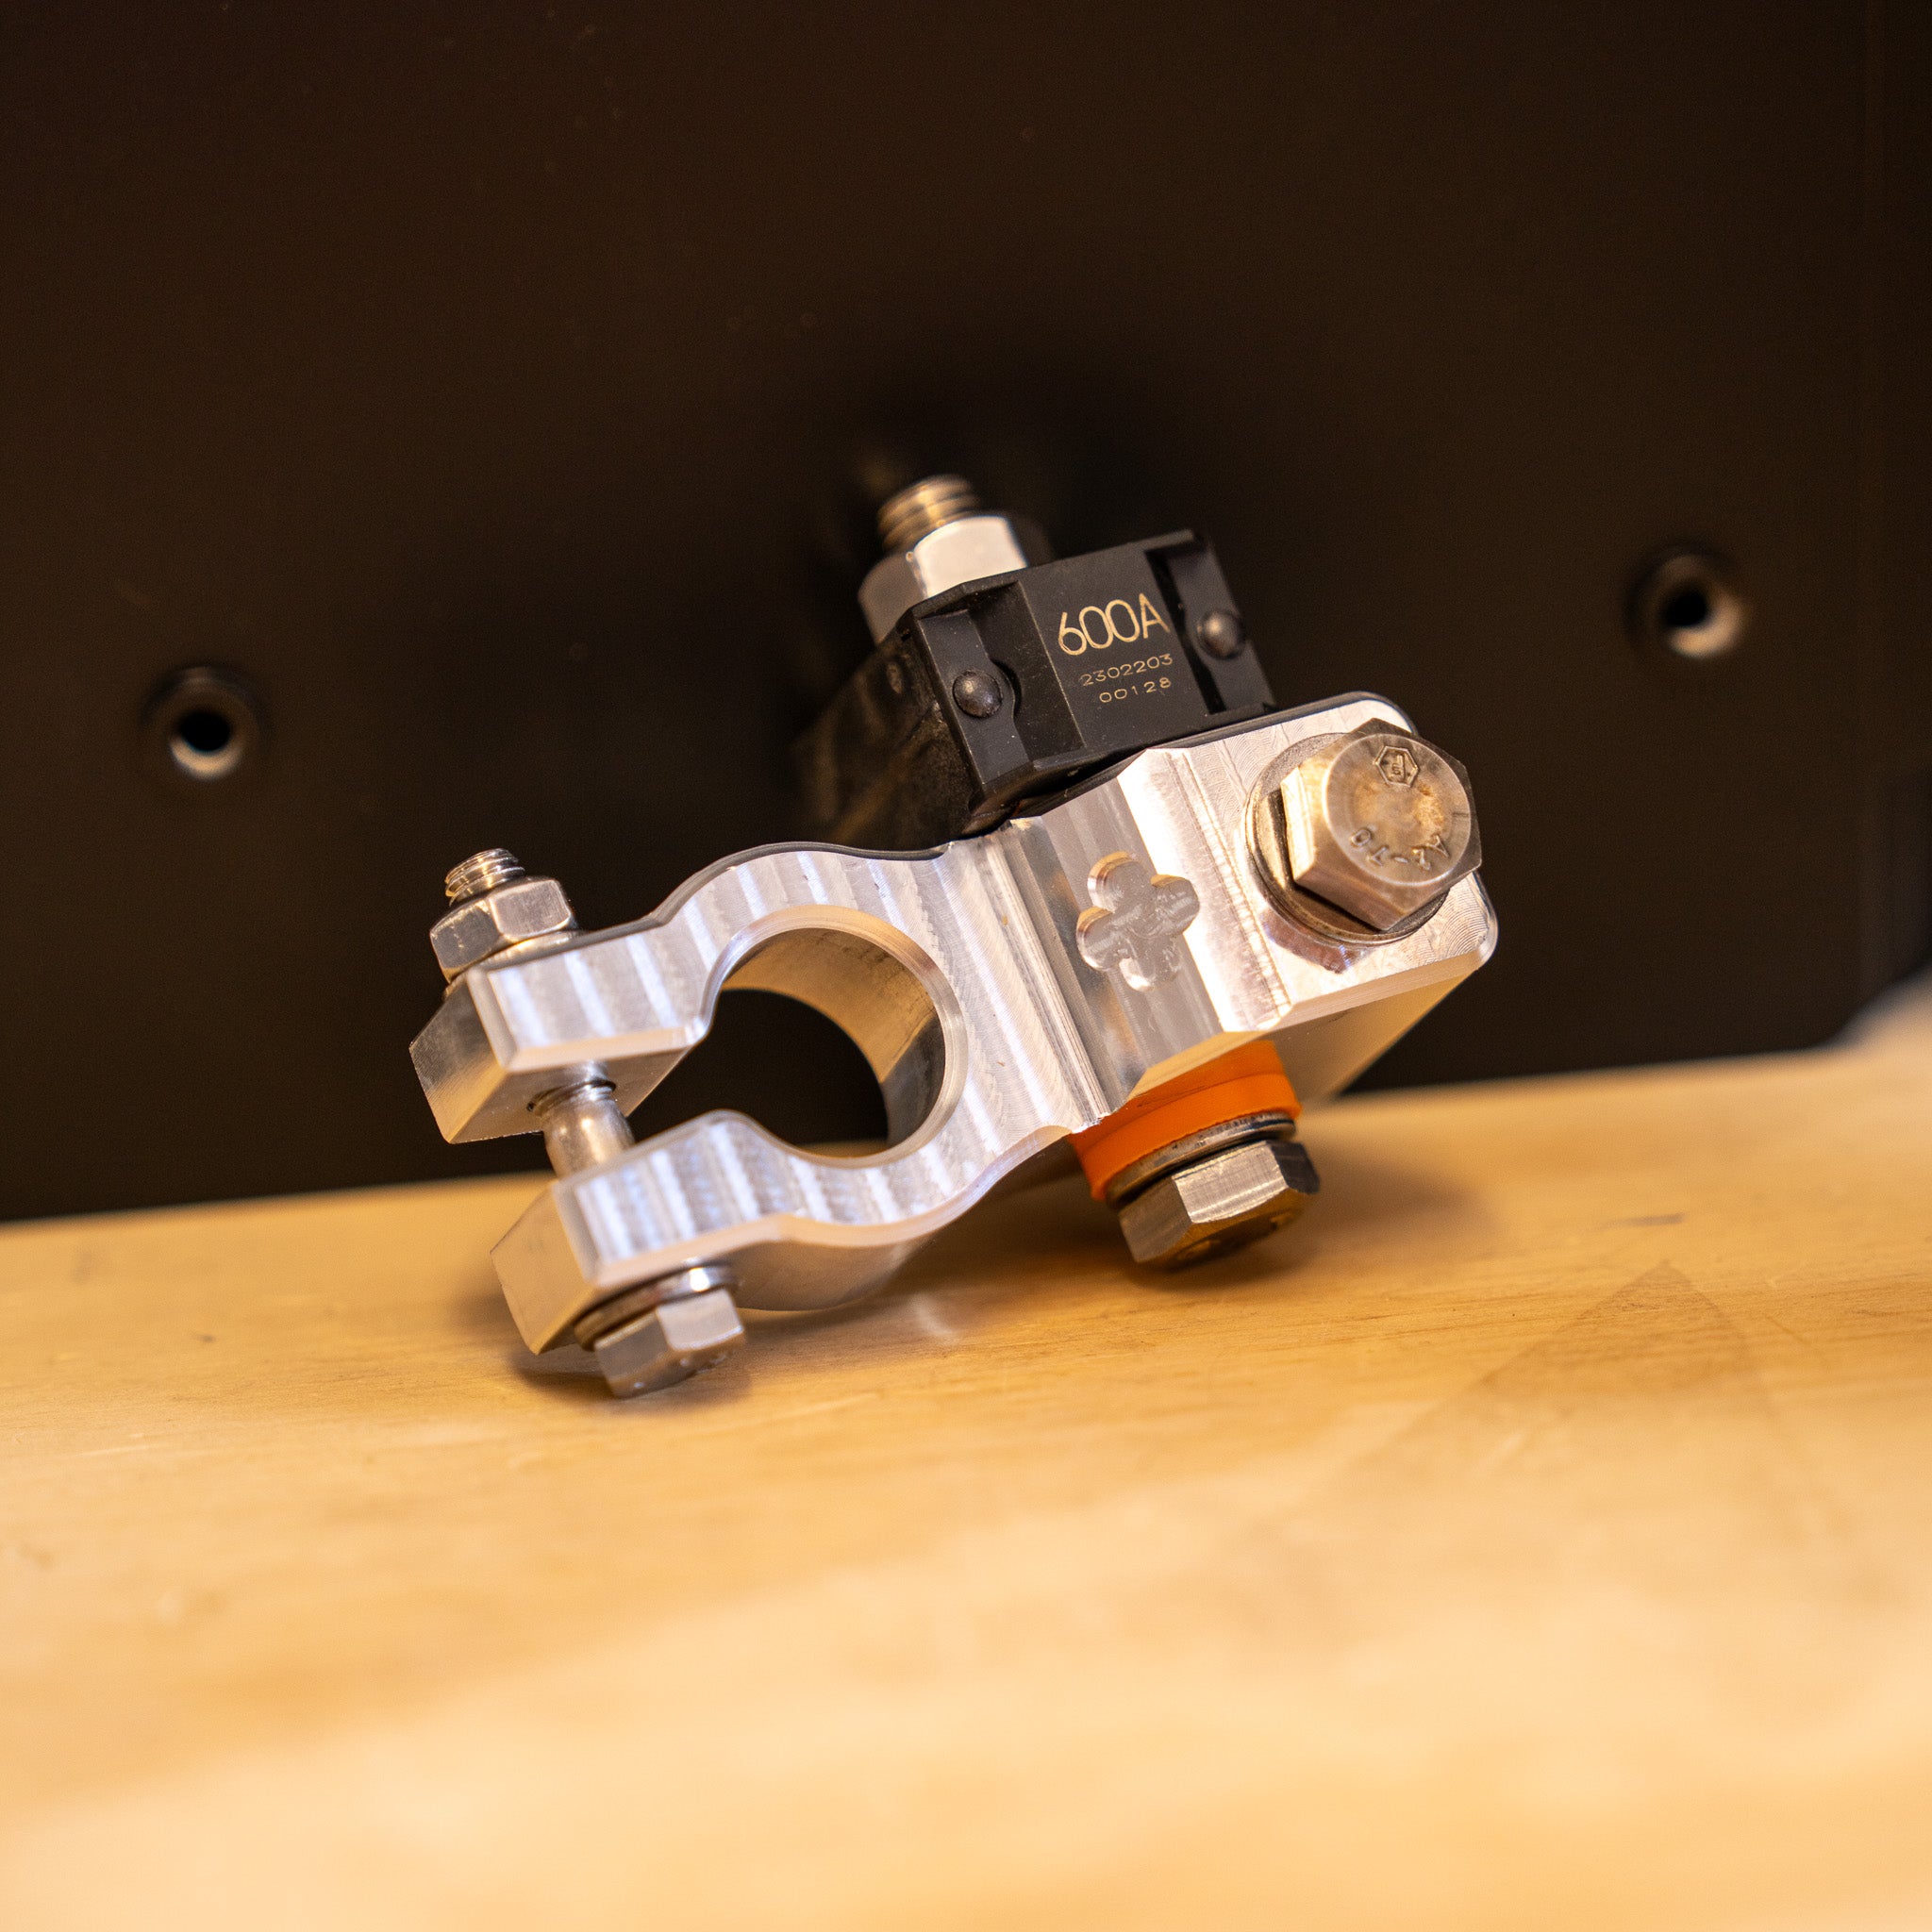
- Billet Blaze Off-Road Battery Terminal
- Blue Sea Systems ground bar
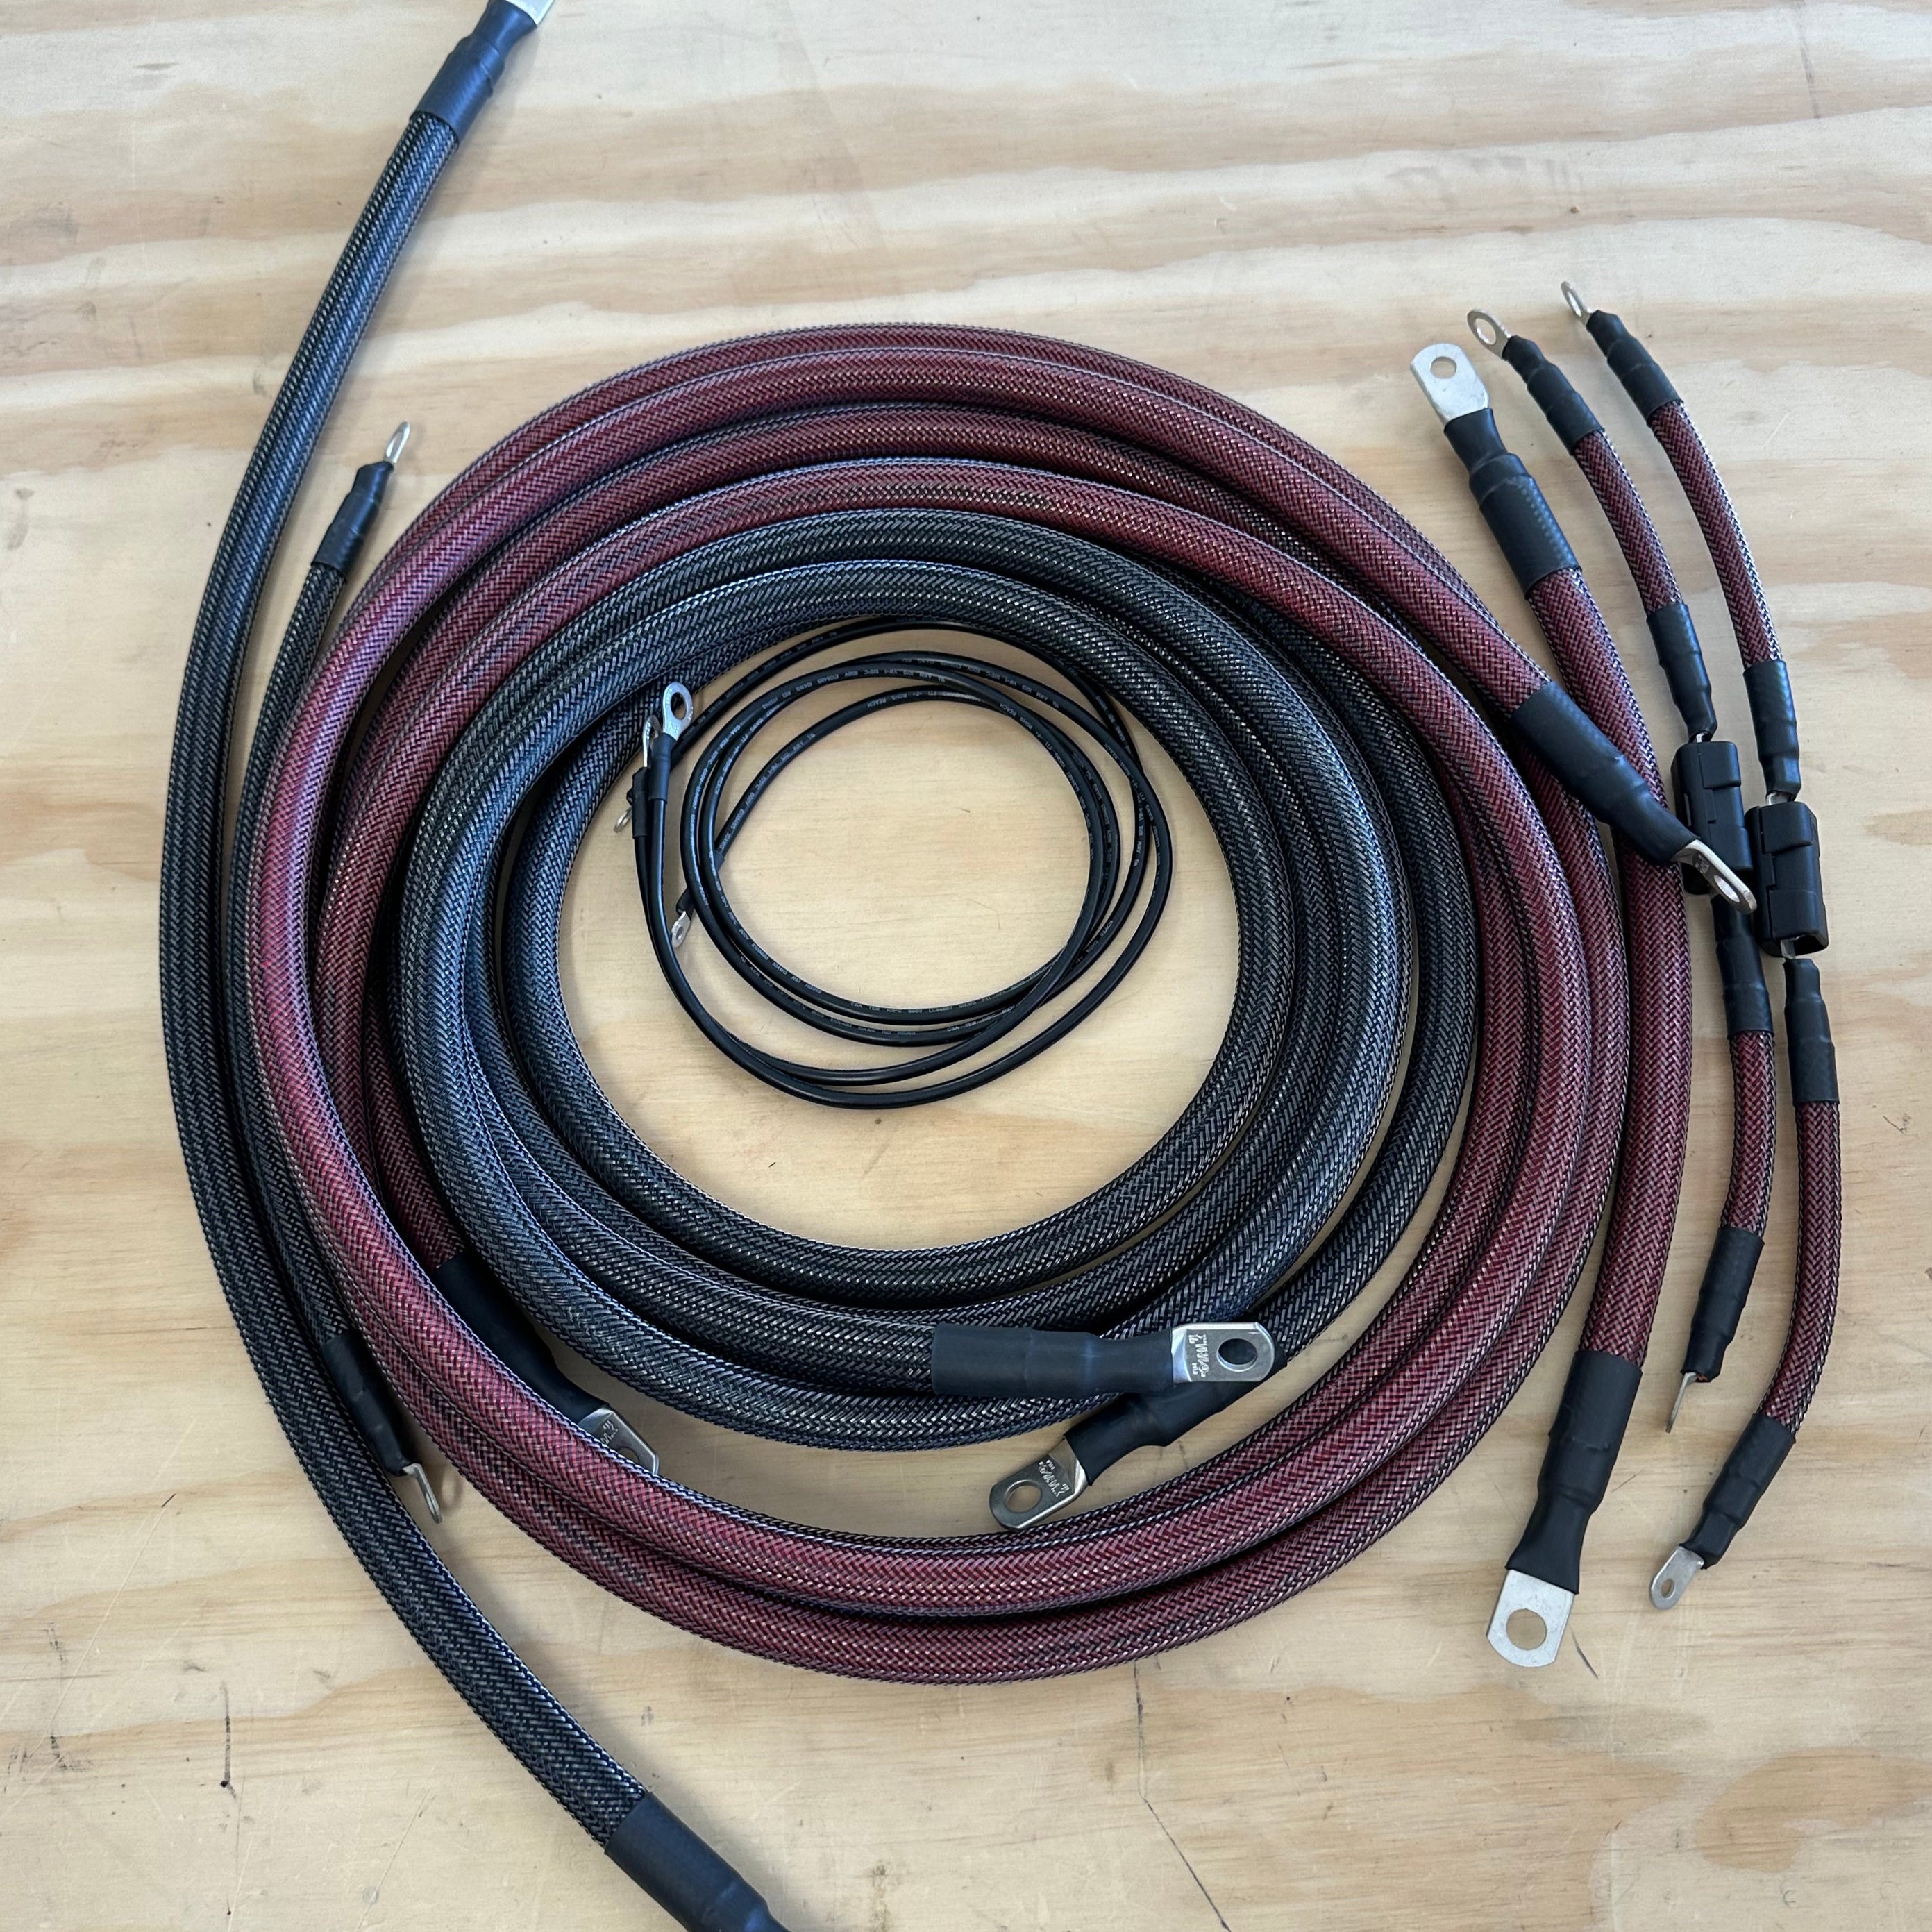
- USA Made power cables from the battery to pass through
- USA Made Power cables from pass-through to under-hood mount
- USA Made power pass throughs
- Power Cables for Garmin PowerSwitch Units
- Ground cables for Blue Sea bar and PowerSwitch units
- Cable protectors for all connections
- USA made laser cut and powder coated aluminum mounting bracket for under the hood
- All fuses, hardware, and other components needed.
We’re working hard to keep all Blaze Off-Road products in stock full-time.
To reach that goal, we’re investing in long-term production contracts, bulk ordering, in-house manufacturing, expanded staffing, and more efficient production methods.
In the meantime, please expect a lead time of 2-4 weeks on all hybrid kits.
We are still working on getting our Instructions video and photos completed. In the meantime, here is an overview:
- Remove the rear battery door (plastic trim cover) and disconnect the battery terminals, removing the power terminal altogether.
- Remove the rear quarter trim to make room for drilling the through fender holes. This piece does not need to come all the way off like other kits, it simply needs to be moved away from the side of the vehicle slightly to make room to fit your hand in to drill.
- Drill the two (1-5/16") holes on the flat spot of the wheel well and mount the two cable pass-throughs.
- Install the under-the-hood bracket by simply loosening the two under-hood bolts it mounts to, sliding it down onto the bolts, then re-tightening the bracket.
- Run cables from under the hood bracket along the frame to pass through the units.
- Install shorter wires from the pass-through to the battery.
- Reconnect factory cables to the battery, pop the panel back in place.
In terms of wiring:
- Power cables (red): The long cable will go from the power post under the hood, down the inner fender well area to the frame, and follow factory lines back to where the pass-throughs are mounted in the rear wheel well, then connect to the red pass-through. The Shorter cable will go from the pass-through to the fuse on the side of the billet battery terminal.
- Ground cables (black): The long cable will run from the ground post under the hood to the pass-through in the rear fender well. The short ground cable will go from the passthrough over to the ground terminal on the battery. It is very important that the final connection you make is to the battery. Do not connect either cable to the battery until everything else is completely wired.
Most Asked Questions About This Kit
How hard is this kit to install?
If you are good at drilling two simple holes for high-quality wire pass-throughs, this kit is not bad to install at all!
Do I need to but anything else besides this kit?
No, this kit, your lights, and harnesses for the lights are all you need to get up and running! This is a 100% complete kit!
Do I need any special tools?
Yes and no, it depends on what you consider special.
You will need a plastic trim tool and a drill with a 1.25" hole saw. Other than that, normal metric sockets and wrenches have you covered!